Basic configuration options
Note
When you move the pointer over a field label, an explanation box pops up to assist you during module configuration.
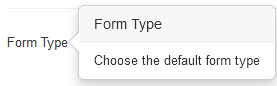
Form type
First, the form type must be chosen.
JForm is the most recent version that integrates new Joomla requirements. This is the default option since version 2.1.
Classic shows the form as it used to be. This option is deprecated and won’t be available in version 3.0 of the module.

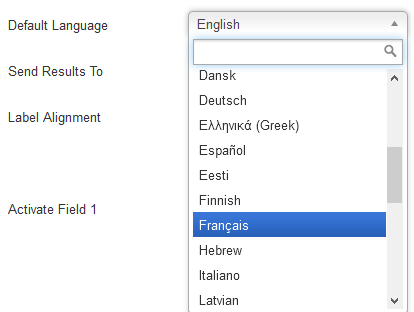
Language
You can then set the language used in the form.
Language files can be found and edited at
/path/to/joomla/modules/mod_simpleemailform/language_files.
Thirty languages are available.
Note
The module is now integrated with Joomla native language support, so this field has no effect on the JForm type.
Email address
Next to Send Results To, you must enter an email address where information gathered by the simple email form will be sent. If there’s more than one address, separate them with commas or spaces.

An empty Email address field will prevent the form from displaying and generate a “SORRY: This email address is invalid! Please re-enter your email address” error.

Field options
Eight options can be used to configure each field:
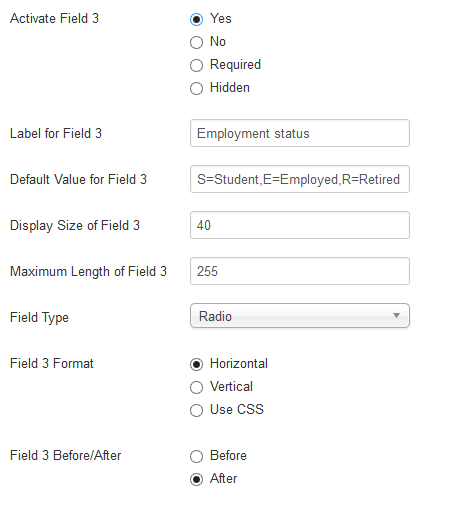
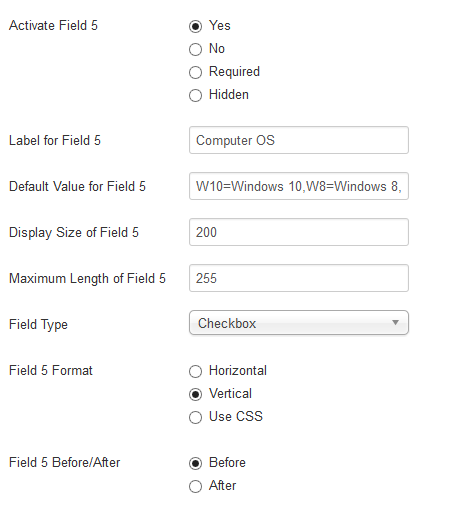
- Activate Field X
- Label for Field X
- Default Value for Field X
- Display Size of Field X
- Maximum Length of Field X
- Field Type
- Field X Format
- Field X Before/After
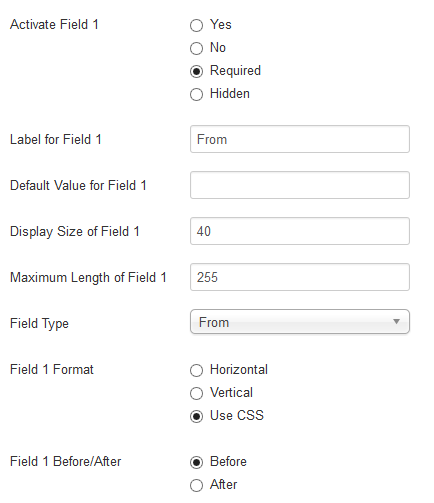
Activate Field X
Set this option to Yes to add field X to your form.
No means that field X won’t appear in the form.
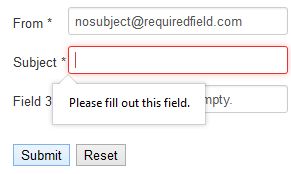
Required means that the user won’t be able to submit the form if the field is empty. These fields are marked with an asterisk (*).
Hidden fields don’t appear on screen. The value is automatically added in the email that is sent to you.
Label for Field X
Short description of the information to be entered in this field.
Default Value for Field X
With field types Subject, Normal and Textarea, the default value appears automatically in the form.
Note
Since version 1.8.5, default values don’t appear in Textarea fields. The HTML5 placeholder attribute is used instead.
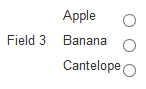
With field types Drop, Radio and Checkbox, this option populates the answers available to the user in this format:
A=Apple,B=Banana,C=Cantelope
In this case, the user will see Apple, Banana and Cantelope on screen. If “Apple” is chosen, “A” is returned.
Note
To set a default for a Drop, Radio or Checkbox field, just make sure the desired default value is the first one specified.
Display Size of Field X
Size, in rows and columns, of a Textarea field. Size is entered in the following format: row,column
With field types Radio and Checkbox, you can enter the width, in pixels, of the labels besides each radio button or box.
Display Size has no effect on other field types.
Note
This option is only available with the Classic form type.
Maximum Length of Field X
Highest number of characters accepted from the user. This field isn’t used with field types Drop, Radio and Checkbox.
Field type
Since version 2.0, available field types are:
- From
- Subject
- Normal (text)
- Textarea
- Drop (select)
- Radio
- Checkbox
From
This field type is used to get the email address of the user filling out the form. The first field defaults to From.

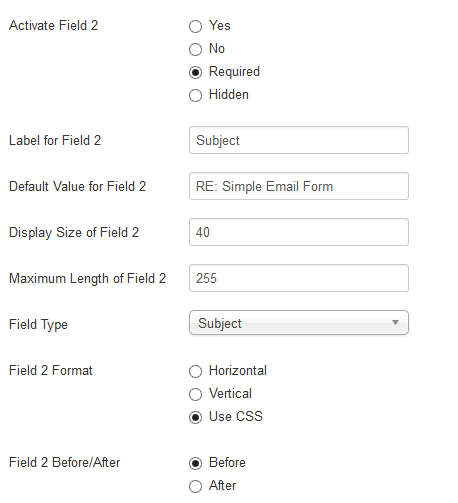
Subject
Whatever the user enters here will become the “Subject” in the email sent to you. The second field defaults to Subject.
Normal
This field will appear as one line on your input form.
If you do not wish to enter a default value, make sure to hit the spacebar.
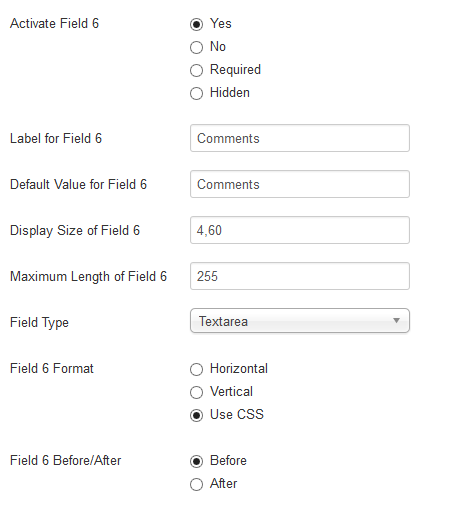
Textarea
Creates a text box in which the user can type a message. Label is the only field that is not ignored by this field type.
Note
The new JForm type displays an HTML editor.
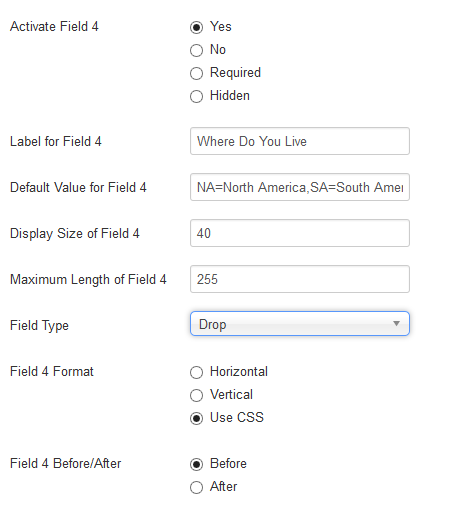
Drop
In the Default Value field, enter options separated by commas as follows: Return1=Visible1,Return2=Visible2.
ReturnX is the value returned in the email message. VisibleX is the value appearing in the form.
Radio
In the Default Value field, enter options separated by commas as follows: Return1=Visible1,Return2=Visible2.
ReturnX is the value returned in the email message sent when that button is selected. VisibleX is the value appearing in the form.
Horizontal format is table/row/col/col/col.
Vertical format is table/row/col/col/row/col/col.
Use CSS (default) assumes you will use your custom CSS.
Before means that the label appears to the left of the button.
After means that the label appears to the right of the button.
Checkbox
In the Default Value field, enter options separated by commas as follows: Return1=Visible1,Return2=Visible2.
ReturnX is the value returned in the email message sent when that box is checked. VisibleX is the value appearing in the form.
Horizontal format is table/row/col/col/col.
Vertical format is table/row/col/col/row/col/col.
Use CSS (default) assumes you will use your custom CSS.
Before means that the label appears to the left of the box.
After means that the label appears to the right of the box.
Field X Format
Only works with Radio and Checkbox field types.
- Horizontal means that all radio buttons or checkboxes are on the same row.

- Vertical means that the various button-label pairs are displayed one above the other.
- Use CSS means that you use your custom CSS to display the buttons or boxes.
Field X Before/After
Only used with Radio and Checkbox field types.
- Before means that labels are displayed to the left of their respective buttons or checkboxes.
- After means that they are displayed to the right.